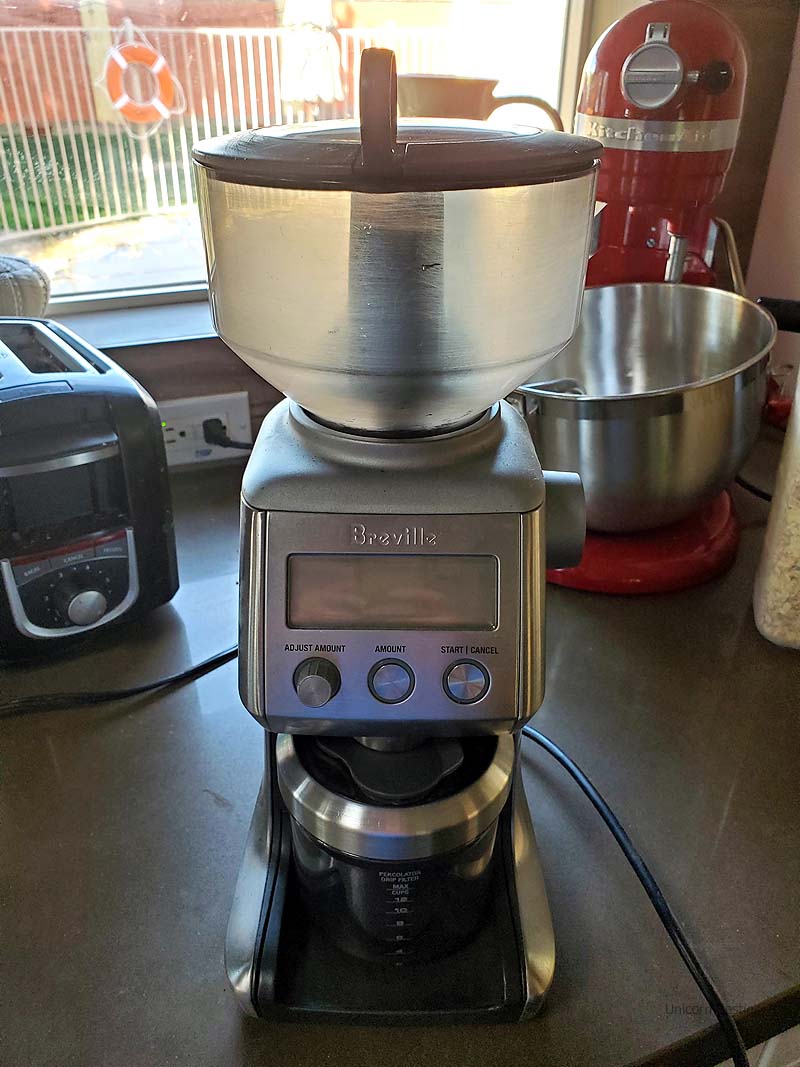
We are going to go over cleaning the Breville Burr Grinder. An oily residue builds up inside the bean hopper and other components from the roasted coffee beans after extensive use.
Initially, I would only remove the hopper and rinse it out with soap and water. After the 2nd and 3rd time cleaning, there are spots you can’t reach without fully taking it apart.
I would recommend cleaning the Breville Burr grinder every 6 months or so, depending on how many beans you grind. It isn’t that complicated to take it apart for cleaning.
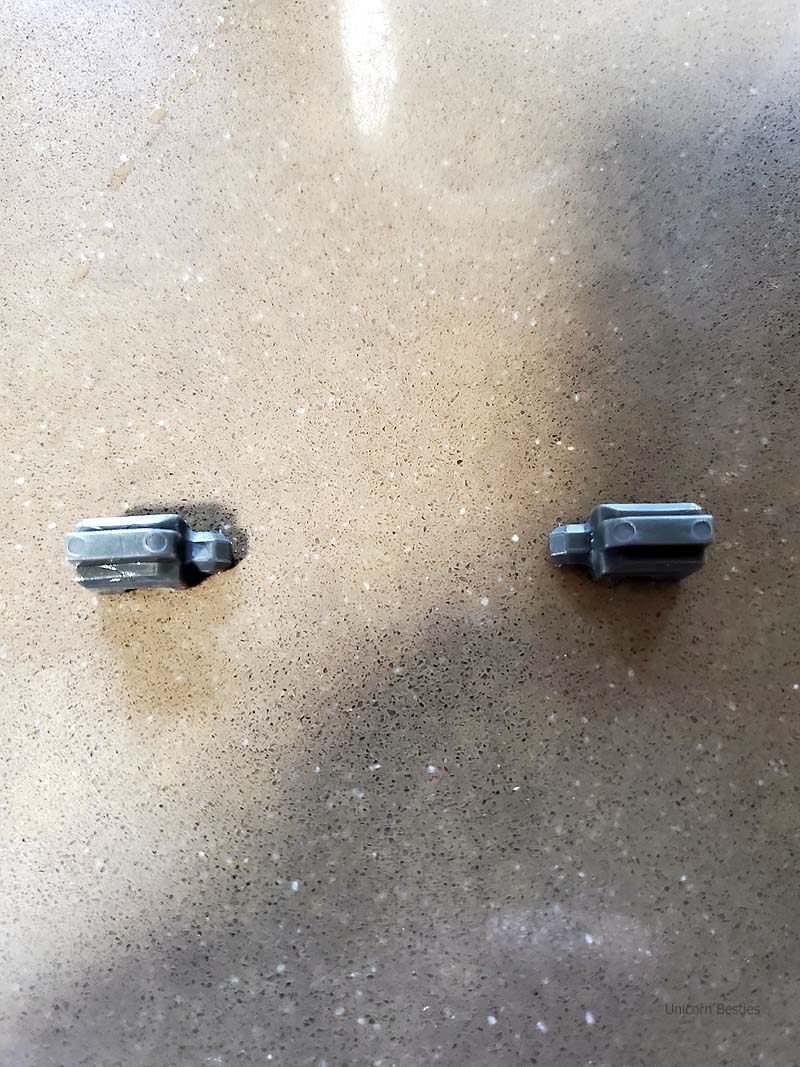
Take caution not to lose any of the small parts. Especially be careful if you take it apart around the sink because of the coffee grounds falling all over the place. The two small plastic pieces will be hard to get out of the drain. Using a small kitchen towel works best.
Table of Contents
Take it Apart
Cleaning the Parts
Put it Back Together
Conclusion
Take it Apart
Tools Required
- Phillips head screwdriver
- Sponge or cleaning towel
- dish soap
- A small hard bristled cleaning brush (the one that came with the grinder?)
Unplug the grinder before taking off any of these components. Unplugging makes it safer to ensure that it doesn’t turn on while apart.
1.
Unlock the hopper from the grinder.
When taking it off, you’ll see some beans come out.
I like to grind the beans until there is none left in the hopper for minimal waste.
Store the fresh ground beans in a Ziplock bag because we are also cleaning the storage container.
You can tell by the sound the grinder makes that no beans are left in the hopper.
2.
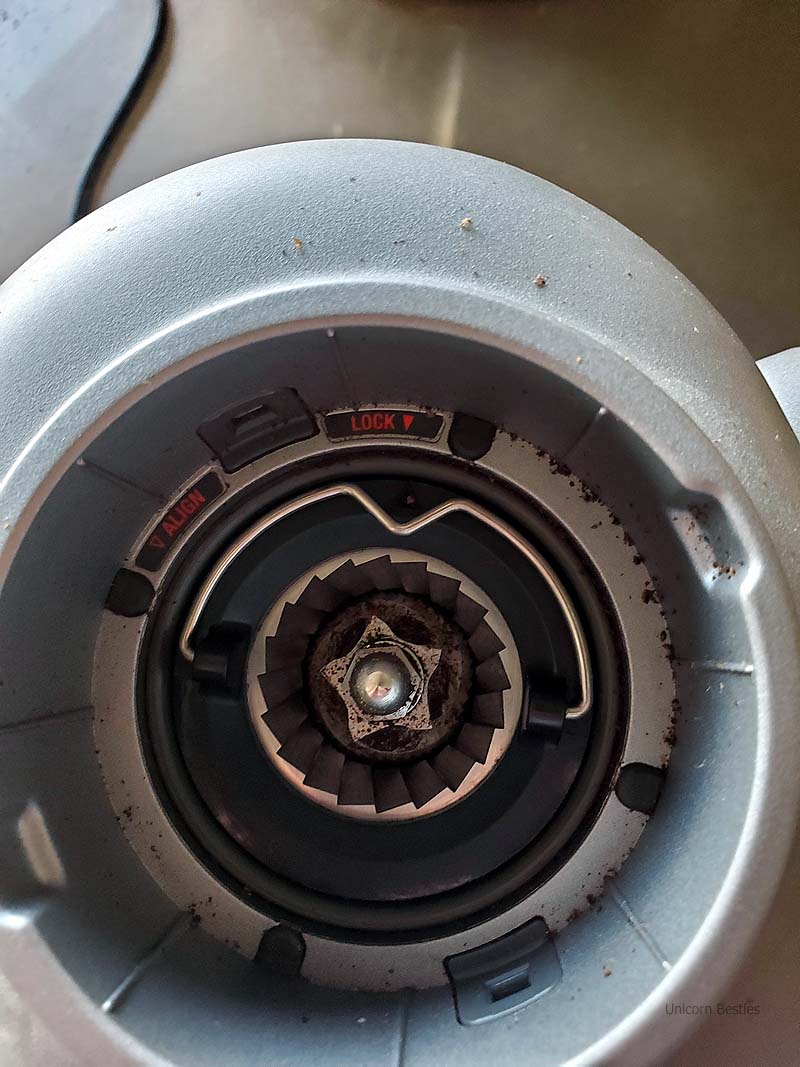
Next, you will out the metal conical grinder part.
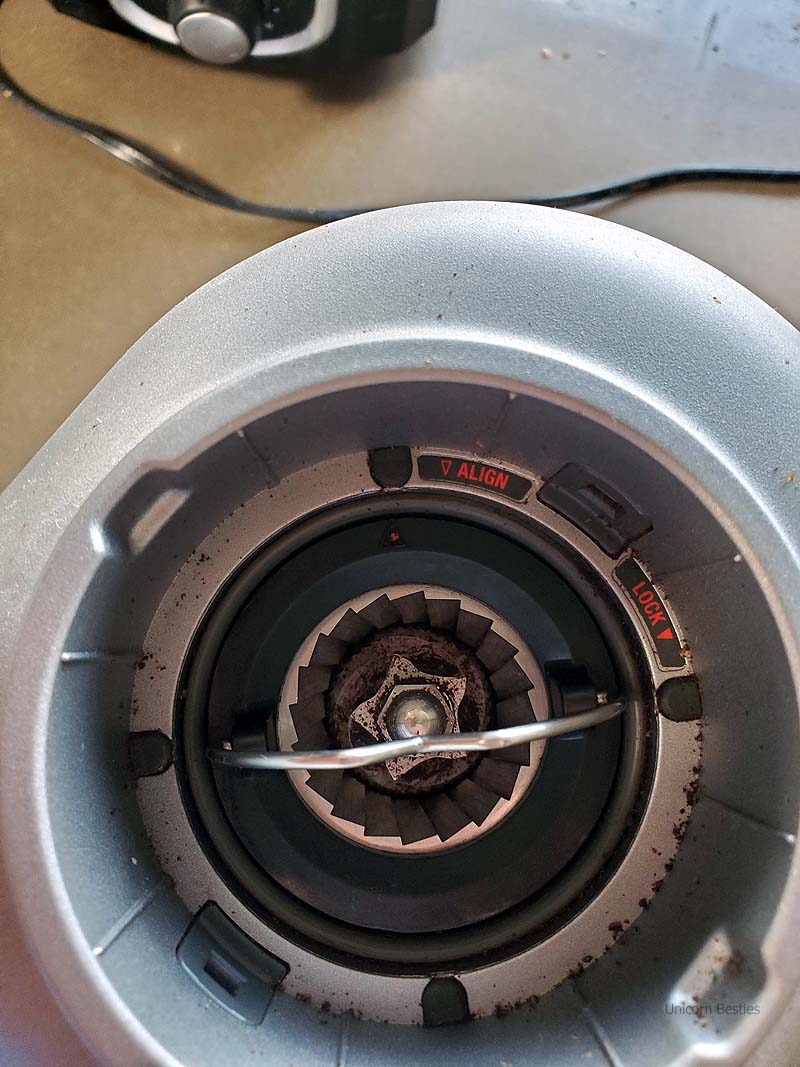
Grab the metal handle and twist to the left to the aligned position.
You can now pull it out.
There will be a lot of coffee grounds in there while removing it.
Not to worry because that is what we will be cleaning out.
3.
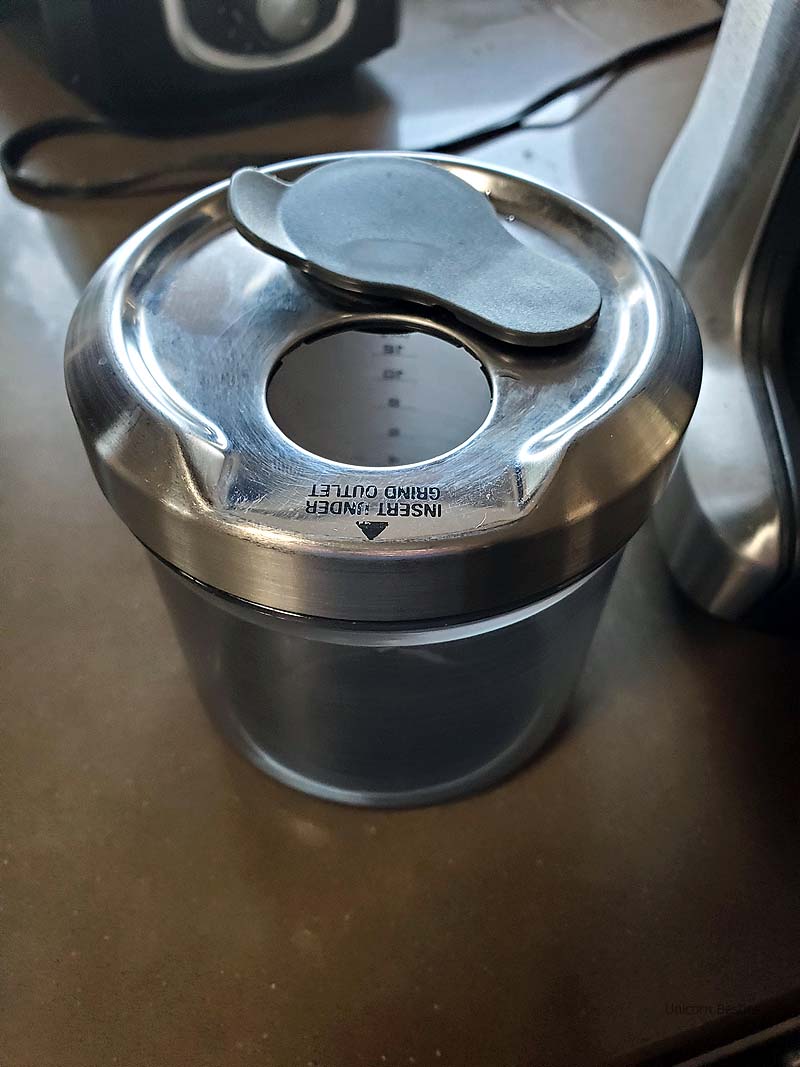
Now we will remove the grounds storage container and the magnetic tray.
You can get quite a bit of buildup in this area, but it’s not going to be as oily as the hopper.
It’s good to clean this part out periodically as well.
4.
Let’s take apart the hopper now.
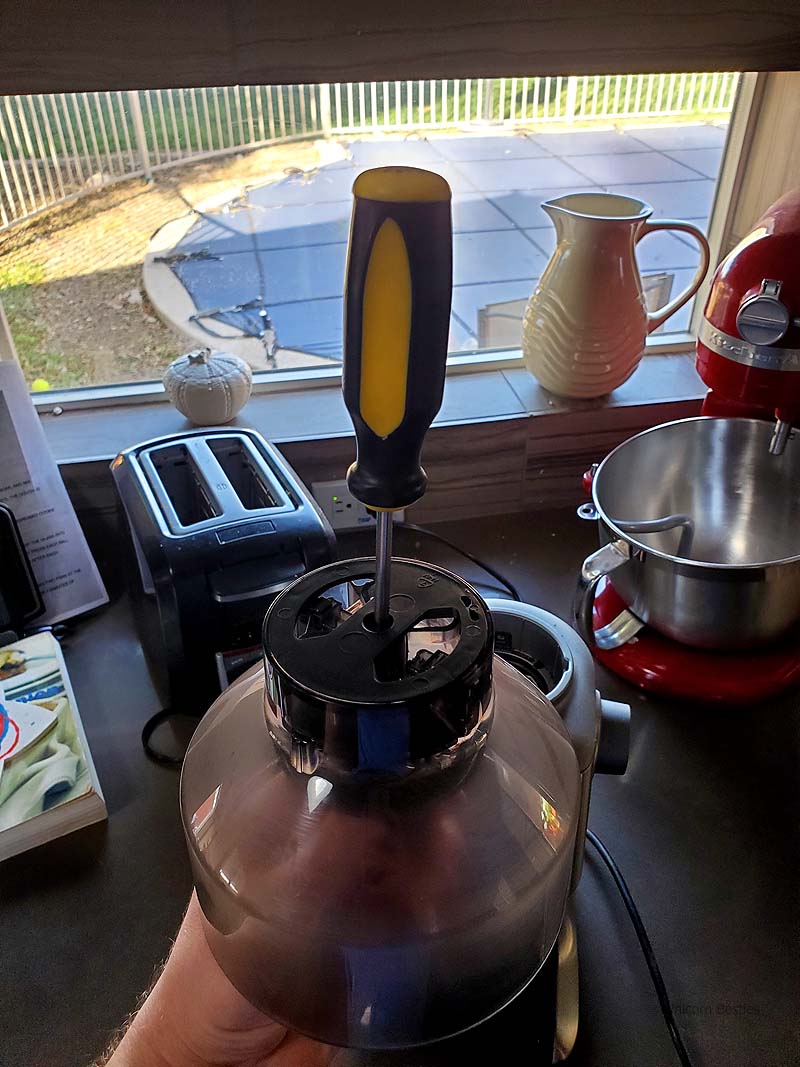
Get the Phillips head screwdriver and flip the hopper over.
You will see a hole where you can put in a Phillips screwdriver.
The screw will allow the lock/unlock knob from inside the hopper to be removed.
5.
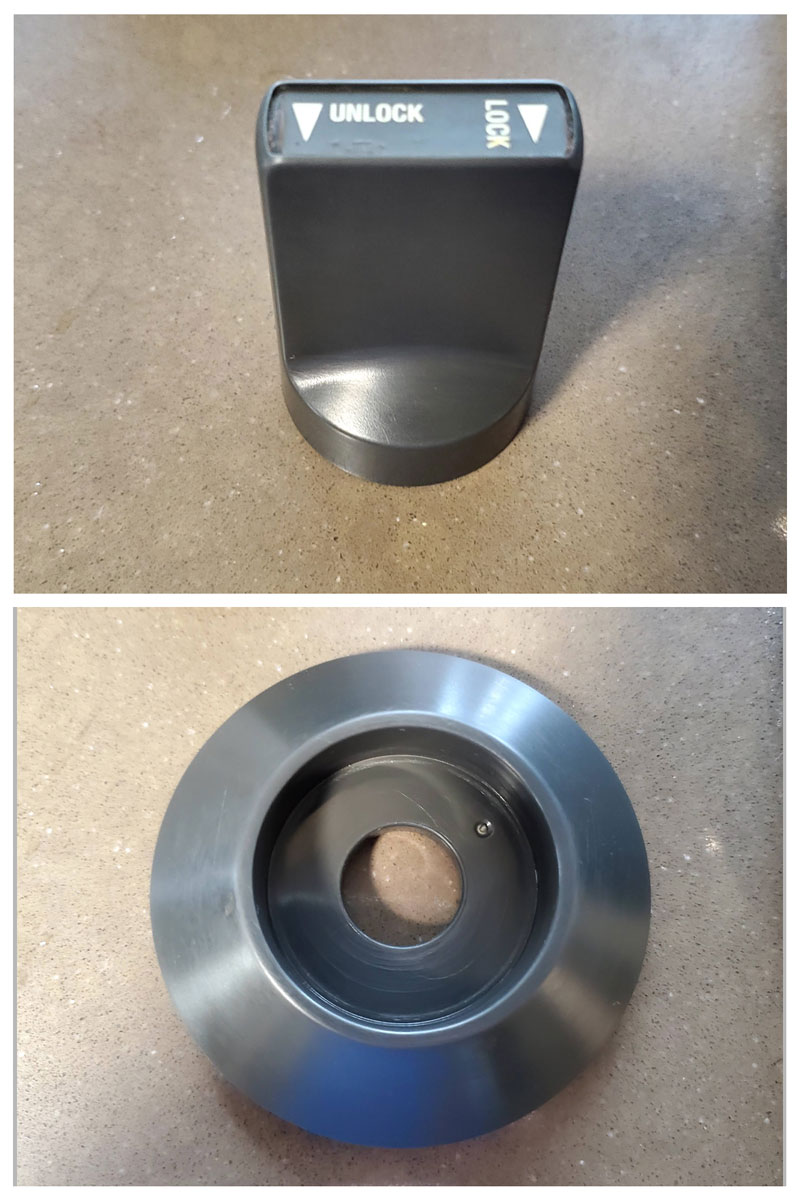
Turn over the hopper, and you will take off the lock unlock nob.
Remove the plastic umbrella shield that keeps the beans flowing down into the side of the hopper.
Gently pull on it while holding the bottom.
6.
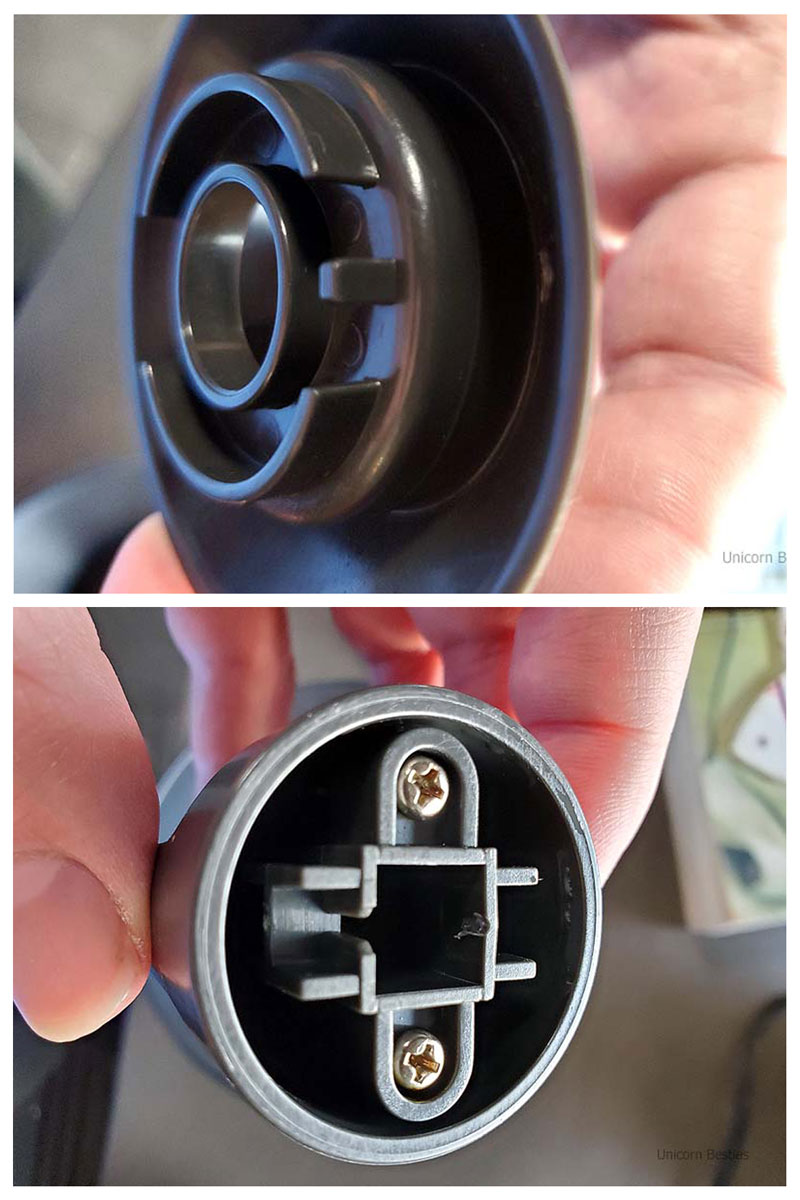
After taking off the bottom lid, two small plastic pieces that lock the hopper in place will easily fall out.
Take caution not to lose those two parts. Your grinder will no longer work if it doesn’t lock in place correctly.
There is a safety mechanism requiring the hopper to be locked in place for operation.
Pick up the Breville burr grinder and dump any remaining beans or grounds into a garbage can.
Cleaning the Parts
I would be very cautious about using harsh cleaners as you don’t want to ruin any components. The inside of the hopper and the bean storage containers can be easily scratched.
With your dry bristled cleaning brush, gently brush on the inside of the grinder machine to get any beans or grounds off. You don’t want to get the main Burr grinder component wet because the electronics could get ruined.
Now go ahead and use soap and water to clean out the hopper and all of the components. I like using a sponge, so I don’t scratch the inside of the hopper or the storage container.
Depending on how long it’s been since you cleaned your grinder, the residue can be challenging to remove. I use hot water with some dish soap to clean all the parts.
Make sure that you let everything dry off before putting it back together. You don’t want to have water in the burr mill. If you grind beans and it is wet, it could clog up the machine.
Putting it Back Together
1.
Flip the hopper upside down.
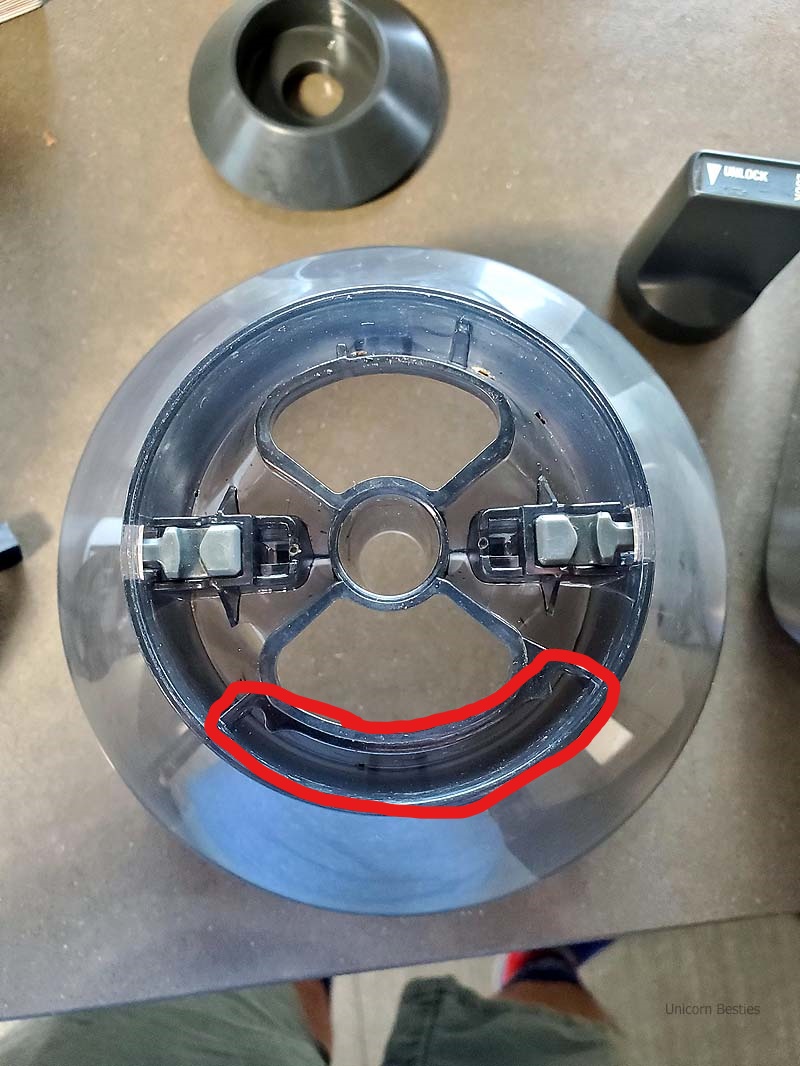
Find the two small plastic parts and insert them into the hopper’s bottom.
You will see that the little knobs angle out, and the channel in the locks will be facing towards you in the image.
2.
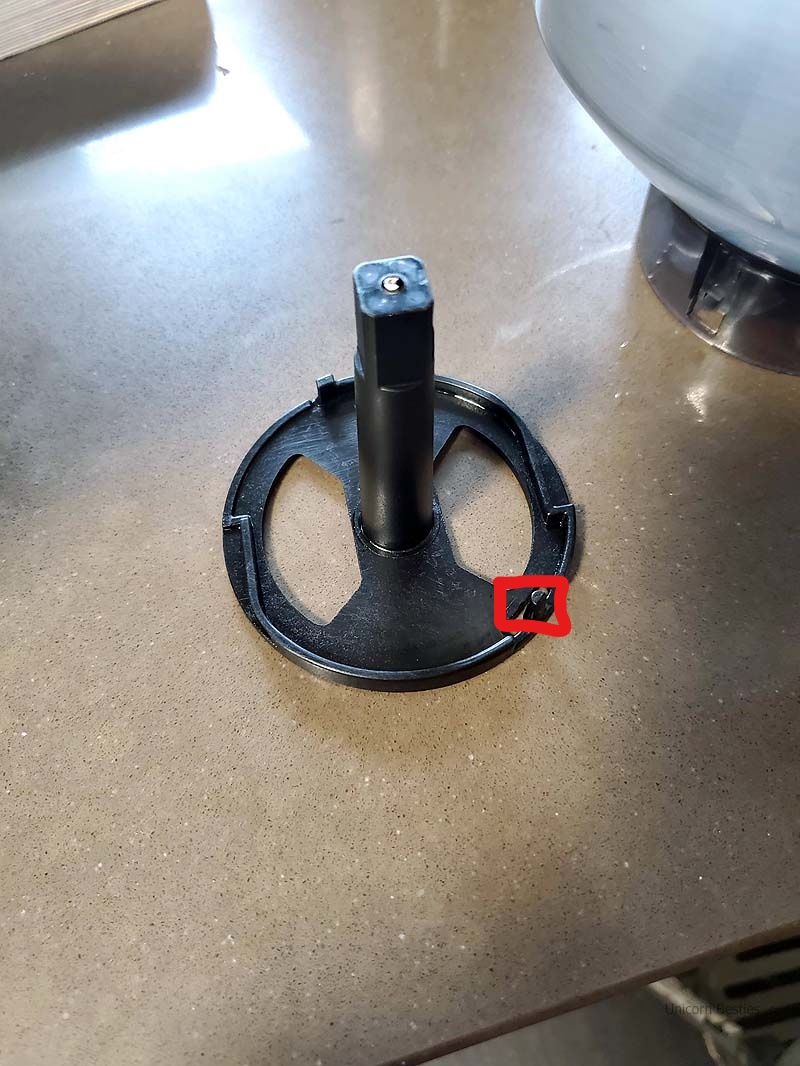
Now pick up the bottom lid and notice a slight notch in it.
I highlighted the picture below.
This notch will go on the specific side so that you can only open and close the bottom lid in a 90-degree turn.
I highlighted the picture in the first step to show where it goes.
Now slide that part back into the hopper and making sure that it’s on the right side.
You can slide it around with your hands at this point just to make sure that the two plastic components click outwards as you twist it into the open and closed position. This is how the hopper gets locked in place.
3.
You will need to hold the bottom and flip it over so that you can put the umbrella part back on top of that component inside the hopper.
There is a notch on the umbrella piece to ensure its put on correctly.
You still have to keep holding the bottom part making sure that it doesn’t fall out; otherwise, you have to start over.
Grab the unlock/lock nob and put it in over the square.
You will see a little notch on the inside to ensure that it gets put in the correct position.
Once you have the lock/unlock knob on, you can flip it over and grab the Phillips head screwdriver.
Don’t overtighten the Bolt as you don’t want to break it.
4.
Put back in the metal conical grinder component where the red dot faces the aligned position.
Twist it to the right into the locking position.
Now you will be able to insert the hopper and lock that into position.
If you do not get the hopper locked correctly, your burr grinder will not turn back on.
The hopper must be in a locked position for it to operate safely.
Conclusion
Overall this is one of the best grinders I have ever owned. I have tried blade grinders and manual hand bur grinders.
This machine is the best one I have tried, and it gives me a great grind every time. Whether I am going for a drip coffee, french press, or espresso, it performs great! It requires minimal maintenance, just occasional cleaning.
The only thing that was disappointing after I cleaned mine was the hopper and the ground beans storage surfaces were easily scratched. I used a sponge with one scratchy side, and it dulled the shiny finish.
Not a functionality issue, just a cosmetic issue. I would highly recommend this Breville Burr Grinder as it has worked for many years for me.


